
This week’s MQTT Tutorial connects a Raspberry Pi, ESP8266 (or Arduino), and a PC together. Remember last week’s post provided an overview of message brokers and MQTT. We learned that MQTT is a hub and spoke protocol for sending messages between IoT devices. Clients can subscribe or publish messages to a central server, called a broker.
Now it’s time to connect our IoT devices together!
For this MQTT tutorial, I have three main elements:
• My Computer, which will act as the broker.
• Raspberry Pi running Python
• ESP8266 controlling an LED
The idea is that the Pi (via Python) will send messages to the PC broker to tell the ESP8266’s LED what to do. For our simple MQTT tutorial, the Pi will blink an onboard LED on the ESP8266 one time.
In this MQTT Tutorial
I am not going to cover how to connect to your network (at least not in detail.) There are plenty of tutorials on that piece for each of the devices mentioned here.
Instead, I am only going to give an overview of communicating with MQTT on each IoT piece.
MQTT for PC
There are quite a few options for an MQTT server. Services like Amazon’s AWS IoT and AdafruitIO are cloud-based brokers. Each offers some advantages. Depending on your project needs you may or may not need the full support of a cloud-based service.
Mosquitto
If you want to host a broker, the open source MQTT Mosquitto is an excellent option. This fully compliant MQTT broker also comes with command-line utilities for publishing and subscribing.
For Windows, there are binary installers on mosquitto.org. For Linux, check your package manager for “mosquitto” or “mosquitto-mqtt.” On Mac, you can use homebrew to install mosquitto.
Note on OSX/Mac add /usr/local/sbin to my PATH.
Running Mosquitto
By default, mosquitto runs on port 1883 with virtually no security. For getting started, this is fine, but eventually, we need to look at adding some security stuff (hey, future post idea!).
I recommend running mosquitto in verbose mode, so you can get a good idea of what it is doing.
$ mosquitto -v
1456272937: mosquitto version 1.4.5 (build date 2015-11-09 14:23:46-0800) starting
1456272937: Using default config.
1456272937: Opening ipv4 listen socket on port 1883.
1456272937: Opening ipv6 listen socket on port 1883.
Testing Mosquitto
With the server code running in verbose mode, open up two more command prompts. We are going to use mosquitto_pub and mosquitto_sub to send ourselves test messages.
Subscribing to MQTT Topic with Mosquitto
First we are going have our client subscribe to a topic called “debug”. Use this command line in your “subscriber” window.
1. mosquitto_sub -h 127.0.0.1 -i testSub -t debug
- The host flag (-h) is the server running mosquitto, in this case, localhost.
- The identity flag (-i) isn’t required. When a client id is not provided, mosquitto_sub will create one.
- The topic flag (-t) is the topic we want to subscribe to, in this case, “debug”.
Notice on the server I didn’t create the topic, the topic is created when the subscriber or publish first hooks into it.
Publish to MQTT Topic with Mosquitto
Now that we have a client listening to a topic, let’s have a client publish to it, here’s the command for that.
1. mosquitto_pub -h 127.0.0.1 -i testPublish -t debug -m 'Hello World'

And we see our client window comes back with our published message! Check out the —help flag on both the mosquitto_sub and mosquitto_pub utilities. There are lots of useful options for both, including -l which reads the message from STDIN.
Okay, now that we have our mosquitto broker running, let’s communicate with our devices.
MQTT for Raspberry Pi (or Python)
One option for MQTT messaging on the Raspberry Pi is just to install mosquitto! You can use the same mosquitto_pub and mosquitto_sub command line tools to communicate with an MQTT server.
The other option is to use an MQTT library for your preferred language. In this case, let’s look at Python.
Install MQTT for Python
The MQTT library I’m using is the Paho Python Client. It’s open source and supports the latest version of MQTT.
Installation is simple. First, install “pip” and then run:
$ pip install paho-mqtt
Don’t forget if you’re using python v3 (like for the QT GUI), you’ll need to run “pip3” instead of “pip”.
Example MQTT Python Code for Raspberry Pi
Paho makes communicating with your MQTT server very simple.
import paho.mqtt.publish as publish
import time
print(“Sending 0…”)
publish.single(“ledStatus”, “0”, hostname=“macman”)
time.sleep(1)
print(“Sending 1…”)
publish.single(“ledStatus”, “1”, hostname=“macman”)
Seriously, it is that simple. Tell the script the hostname of your server (macman), the topic (ledStatus), and the message (0) or (1).
In this MQTT Tutorial example, we’re sending a ‘0’, waiting one second, and then sending a ‘1’. These actions will cause the LED on the ESP8266 to turn off briefly and then turn (back) on.

Now that our Raspberry Pi is sending MQTT messages let’s receive them. The next section gets our ESP8266 (or could be an Arduino with WiFi/Ethernet Shield) receiving messages on the topic “ledStatus” and blink an actual LED!
MQTT for ESP8266 (and Arduino)
PubSubClient is an Arduino-based MQTT client. With just a few lines of code, it is very easy to either subscribe to topics or publish new ones.
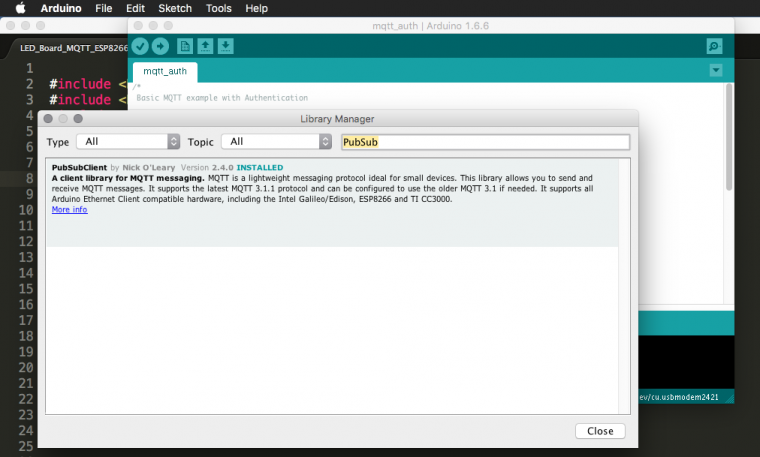
Install MQTT for Arduino IDE
Installing PubSubClient for the Arduino IDE is easy. Either install manually from GitHub or use the Arduino Package Installer. Simple!
Arduino ESP8266 and Uno Note
Switching between my Uno with Ethernet Shield and an ESP8266 took no effort on my part. The library works great with either.
Code Example for Arduino MQTT
The examples included with the PubSubClient are excellent. I think there are even ESP8266 examples particular to MQTT. Make sure you check those out when you are getting started.
Here’s my code for connecting to WiFi and subscribing to the topic “ledStatus”. When the ESP8266 receives a message, it acts by turning the “ledPin” on or off.
#include <EEPROM.h>
#include <ESP8266WiFi.h>
#include <PubSubClient.h>
#include <Wire.h>
#include <Adafruit_INA219.h>

// Connect to the WiFi
const char* ssid = "Dear John";
const char* password = "password123";
const char* mqtt_server = "macman";

WiFiClient espClient;
PubSubClient client(espClient);

const byte ledPin = 0; // Pin with LED on Adafruit Huzzah

void callback(char* topic, byte* payload, unsigned int length) {
Serial.print("Message arrived [");
Serial.print(topic);
Serial.print("] ");
for (int i=0;i<length;i++) {
char receivedChar = (char)payload[i];
Serial.print(receivedChar);
if (receivedChar == '0')
// ESP8266 Huzzah outputs are "reversed"
digitalWrite(ledPin, HIGH);
if (receivedChar == '1')
     digitalWrite(ledPin, LOW);
}
Serial.println();
}


void reconnect() {
// Loop until we're reconnected
while (!client.connected()) {
Serial.print("Attempting MQTT connection...");
// Attempt to connect
if (client.connect("ESP8266 Client")) {
Serial.println("connected");
// ... and subscribe to topic
client.subscribe("ledStatus");
} else {
Serial.print("failed, rc=");
Serial.print(client.state());
Serial.println(" try again in 5 seconds");
// Wait 5 seconds before retrying
delay(5000);
}
}
}

void setup()
{
Serial.begin(9600);

client.setServer(mqtt_server, 1883);
client.setCallback(callback);

pinMode(ledPin, OUTPUT);
}

void loop()
{
if (!client.connected()) {
reconnect();
}
client.loop();
}
Notice that HIGH and LOW are reversed for the LED pin…
All of the magic happens inside of the function “callback”. In your real code, you probably want to write a function to handle receiving messages. Since I’m only sending single character messages on one topic, this simple code works.
Conclusion
This MQTT tutorial is pretty basic. However, it shows the minimum necessary to connect a Raspberry Pi, ESP8266 (or Arduino), to a PC running an MQTT Broker.
Credits: BaldEngineer