
Node-RED
is a browser-based flow editor that lets users wire together hardware devices, APIs, and online services in new and interesting ways.
Node-RED’s nodes are like npm packages, and you can get them the same way. And because Node-RED has a built-in text editor, you can make applications as complex as you like by adding JavaScript functions.
Because Node-RED is based on Node.js and takes advantage of the event-driven, non-blocking model, it can be run on low-cost hardware like the Raspberry Pi or in the cloud.
In this tutorial, I’ll show you how to create Node-RED flows, how to install nodes, and how to create IoT flows to control things like smart bulbs.
Getting started
Prerequisites
You need to have Node.js and npm installed. You can download them right here, or by using your package manager in most Linux distributions.
Installation
Getting Node-RED running globally is as easy as:
sudo npm install -g node-red
More detailed instructions are available on the Node-RED website.
First flow
Once Node-RED is running, you can access to it pointing your browser at http://localhost:1880. You can always use a browser from another machine if you know the IP address or name of the Node-RED instance http://{Node-RED-machine-ip-address}:1880
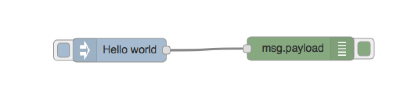
1. Insert an inject node
Drag and drop an inject node on the flow editor, then double click and set up the payload as string and write “Hello world”.
2. Insert a debug node
Drag and drop the same way as you did with the inject node.
3. Wire them together as follows:
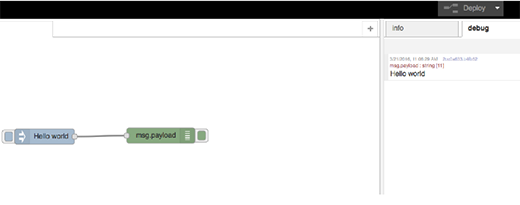
4. Deploy
Click on the deploy button on the right corner.
Installing nodes
As we said before, Node-RED nodes are like npm packages, so the way to download a new node is using the node package manager.
We will use the Netbeast node. Netbeast is an application development platform for Internet of Things appliances and devices that aims to remove the hassles of dealing with wireless protocols, brand-specific APIs, device detection, and things like that.
We can install the npm package in two ways:
Locally:
cd $HOME/.node-red
npm install npm install node-red-contrib-netbeast
Globally:
sudo npm install -g npm install node-red-contrib-netbeast
Creating IoT with NodeRed
After using the netbeast-red node, you will be able to control a virtual light bulb (color, status) with ease. This will work for real smart bulbs too. You can also use it to control your speakers, smart plugs, or even Chromecast.
If you have already done all the previous steps, you will have the Node-RED platform running with the Netbeast node available on the flow editor.
The netbeast-red node will communicate with the Netbeast dashboard and all the smart devices in your home.
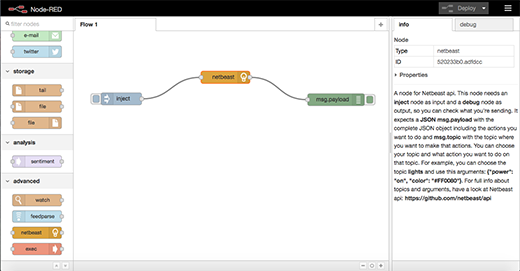
The first thing you need to do:
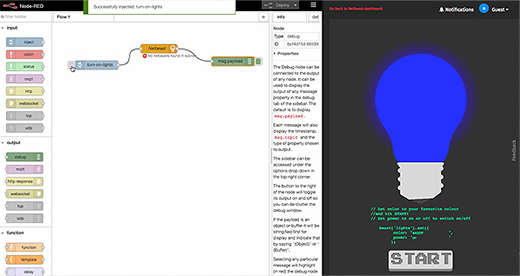
Drag and drop to the flow editor the Netbeast node, inject and a debug node like this:
Now, you need to set up the inject like so:
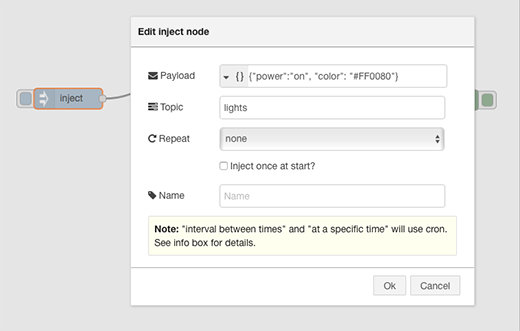
Before injecting the message to the Netbeast API, we need to have the Netbeast dashboard and the bulb running. To do that, check out this post that shows how to start the Netbeast dashboard and install the interactive bulb.
Once we have that, just inject and you will see how the color of the light changes.
Going further
I’ve showed you how to create a “hello world” application, how to install new nodes, and how to create a more complicated application with the netbeast-api node, but this just skims the surface of Node-RED’s power.
You can access to the flow and node library and start trying new nodes or download flows that have been already built. The possibilities are endless.