
Node-RED
It is a new open-source tool created by the IBM Emerging Technology team that lets you build applications by simply wiring pieces together. These pieces can be hardware devices, web APIs, or online services.
On IBM Bluemix it’s easy to create a new Node-RED runtime. With just a few clicks you have a working environment, ready for you to create your new application. In this article, we’ll show you how to build—in just a few minutes—a real-time chat application on Node-RED using Bluemix.
What you’ll need
A Bluemix account
Basic knowledge of HTML, CSS, and JavaScript. We provide all the necessary code, but a basic understanding of these technologies will help you understand the details.
Step 1. Create your Node-RED application
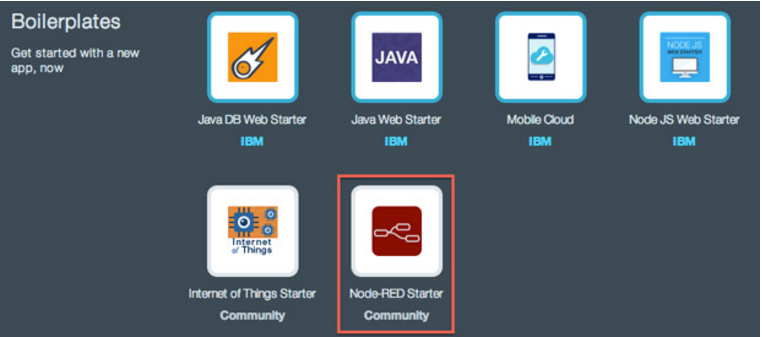
- Log in to your Bluemix account and create a new Node-RED boilerplate.
- Give your application a name and click CREATE.
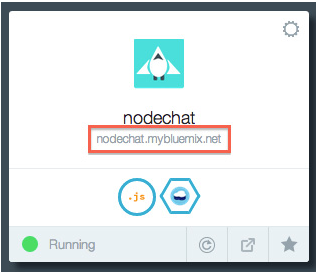
- On the Bluemix dashboard, navigate to the URL provided for your newly created application to launch Node-RED’s main page.
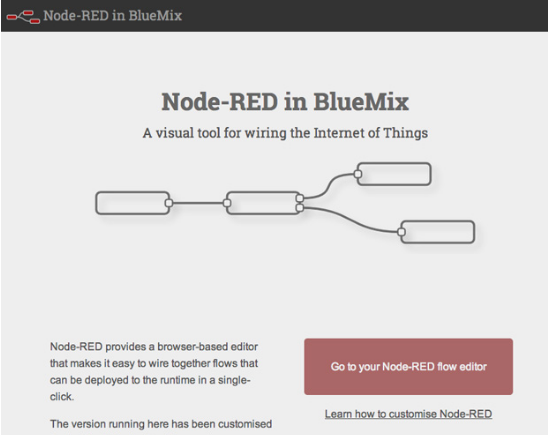
- Now click Go to your Node-RED flow editor to open the flow editor.
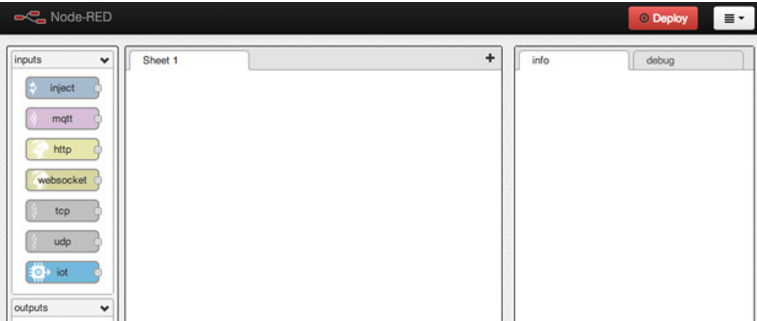
- You should see a blank sheet where you can start building your app. When using Node-RED we build our apps using this graphical editor interface to wire together the blocks we need. We can simply drag and drop the blocks from the left menu into the workspace in the centre of the screen and connect them to create a new flow.

Step 2. Import the code
Every Node-RED application can be imported and exported using the JSON format. So let’s import our chat app into the new sheet.
- Download the nodechat.json file.
- Copy the entire file’s content, then go back to Node-RED in your browser.
- Click on the menu button in the top right corner and select Import from… > Clipboard…
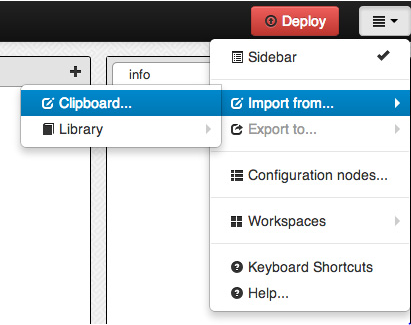
- Paste the file’s content that you copied from the repository and click Ok.
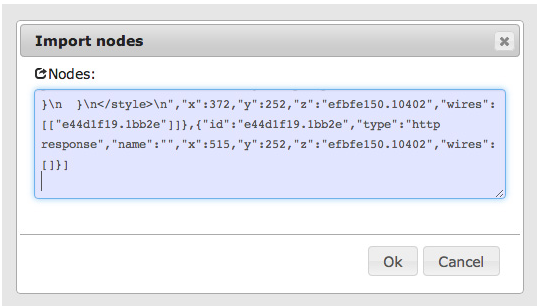
- Click somewhere on the blank sheet to add the nodes that were imported.
We will explain what each piece does later on this article, but now it’s time to deploy and run your application.
Step 3. Deploy and run application
- Click the red Deploy button next to the menu button to make your application live.
- You should see a success message appear on the top, and the blue dots on the nodes will disappear. These dots indicate when a node has been changed but not yet deployed.

- Now open a new tab on your browser and go to
http://[app name].mybluemix.net/chat, changing [app name] to the name you gave your application.
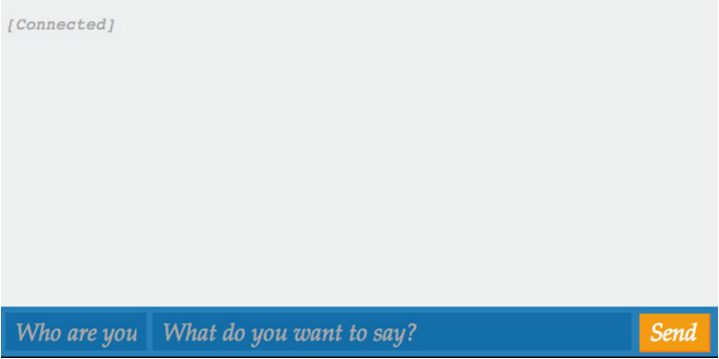
- You now have your chat application running. Enter a username in the field on the left, write a message on the box on the right, and press Send.
- Open the chat in a second window or send the link to some friends and have fun. You should receive the messages instantaneously.


Step 4. Explaining the code (optional)
In this section, we explain the code behind our application in more detail. You can skip this section, but we recommend you read through it to better understand how the app is built and to learn more about how Node-RED works.
-
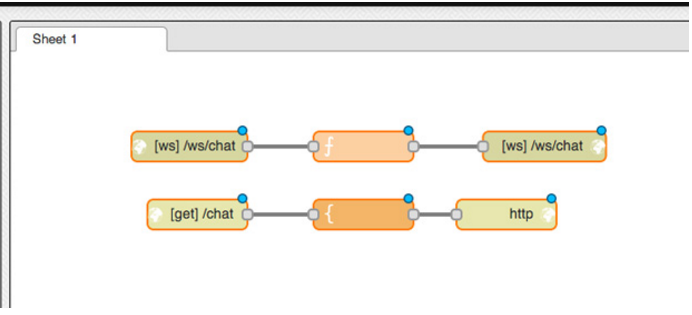
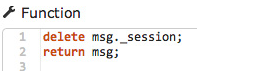
In the first section, we have three nodes:
- WebSocket in
- Function
- WebSocket out
![]()
These are the blocks responsible for creating the communication channel and processing the messages in real-time using the WebSocket protocol. The Function block is very simple. It only removes the value for _session from the msg object so that the message is broadcast to all clients connected to the WebSocket.
2. The second flow is responsible for the client-side code. It has an HTTP in node, a Template to render an HTML page, and an HTTP out node for response.
![]()
The HTTP in node ([get] /chat) creates an endpoint to receive GET requests and forwards those requests to the Template. The HTTP out node creates the proper response to be sent back to the user after the template has been rendered.
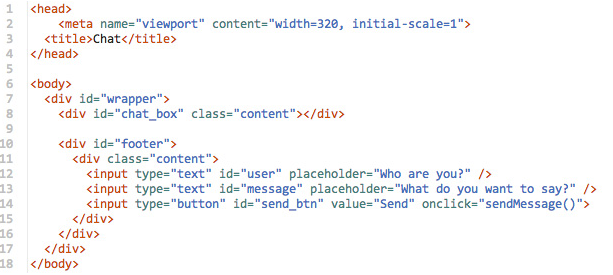
3. The template can be broken into three parts: page structure, message handling, and visual.
4. The page structure is a simple HTML page that contains a div that will receive all the chat messages, and a footer that holds the fields for sending messages.
5. Message handling is done using JavaScript. First, we open a connection to the WebSocket endpoint we created using Node-RED.
![]()
Next, we register event handlers for the ws object to handle events such as opening and closing connections with the server and receiving new messages.
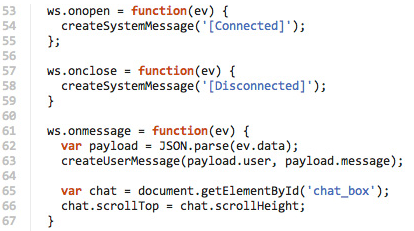
6. When the user sends a message we create an object with the username and the message, which is sent to the server using the send method in our ws object.

7. The visual part is done with some simple CSS rules that are not covered in this article.
Conclusion
Node-RED simplifies code development by providing us with a set of nodes ready to be wired together and used. As shown in this article, it takes very little work to have a server set up on Bluemix to use in your projects. You can enhance this simple chat application even more by adding new nodes and creating new flows to connect to the existing ones.