
IBM Internet of Things Foundation (IoT Foundation) is now named IBM Watson IoT Platform. The Bluemix service names have also changed. This article was written using the previous service names and the Bluemix classic interface. The content and images have not been updated. It is provided “as is.” Given the rapid evolution of technology, some steps and illustrations may have changed as well.
There’s plenty of buzz around the Internet of Things (IoT) these days. Everyone’s talking about how your house, car, boat, or solar-powered thingamajig will be sending out real-time data streams about how it’s currently operating, which opens up a new range of technology applications and business opportunities.
If you’re a PHP developer who is interested in building IoT applications, though, it’s often hard to cut through the hype and understand how IoT devices and applications will operate on a technical or implementation level. At least that’s the way it was for me. And, until I gained a fundamental understanding, I found it hard to begin imagining and building applications to take advantage of the IoT-enabled universe.
It took me some time, and quite a few experiments, to begin understanding the world of IoT (and I’m still learning). In this beginner article, I hope to save you that time and effort, by walking you through the process of building an IoT application that uses my favourite programming language, PHP.
I’ll show you how to use the IoT Starter Application for Android to turn your Android phone into a GPS sensor that constantly publishes its location to the Bluemix cloud. I’ll then show you how to connect a PHP application with this data stream and use it to track the location of the Android phone in real time in your web browser.
Step 1: Build a Bluemix app and bind the Internet of Things Foundation Service to it
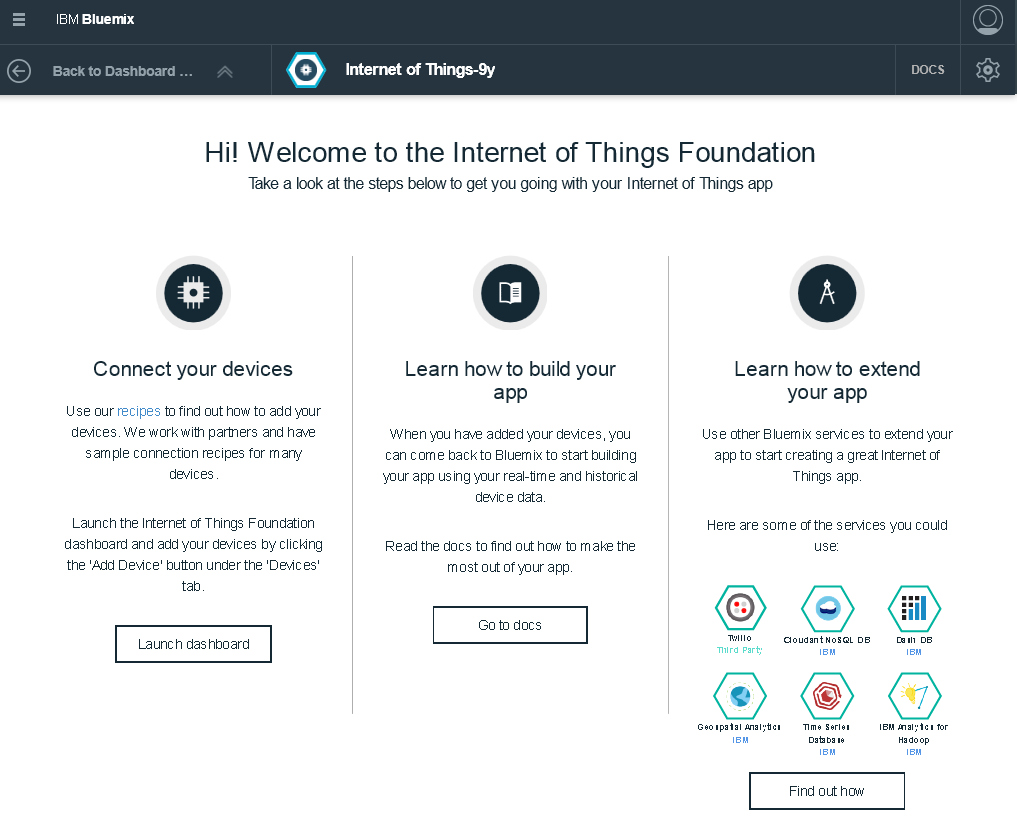
One of the quickest ways to get started with IoT is with the Internet of Things Foundation (IoT Foundation) service from IBM. This service is a cloud-hosted service that serves as a central point of contact for all your IoT-enabled devices and applications. In simple terms, devices publish their data to the IoT Foundation service in the cloud, and mobile or web applications consume that data.
Since the IoT Foundation service is a critical component of the application we’re building, we’ll set it up first. The easiest way to get started with the IoT Foundation is to create a new Bluemix application, then bind an IoT Foundation service instance to it.
- Log in to your Bluemix account.
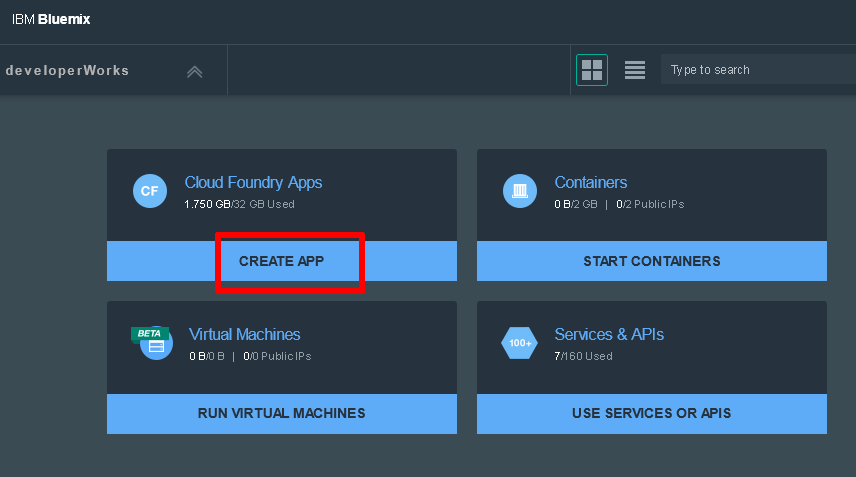
- From your Bluemix account dashboard, click CREATE APP.
- Click WEB as the type of app that you are creating.
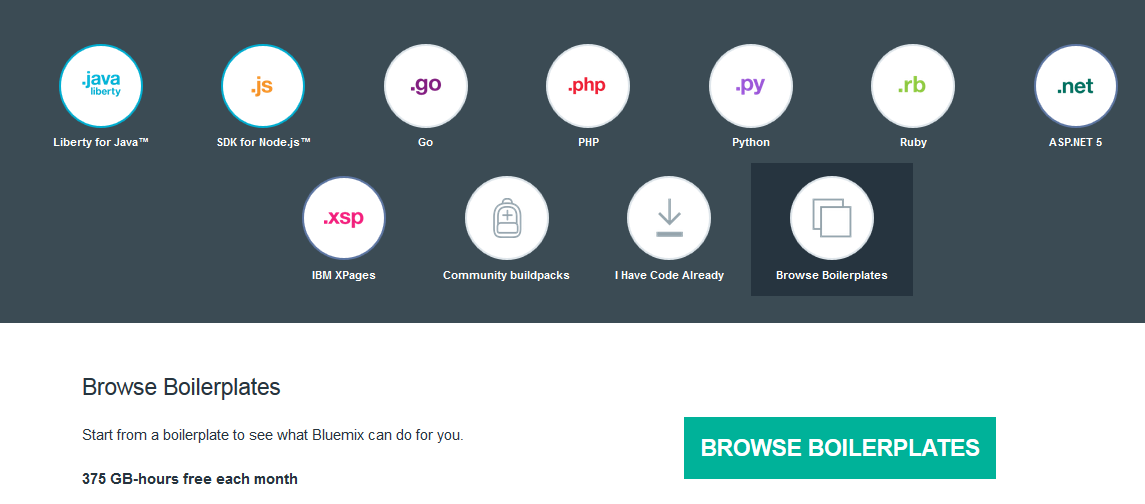
- Select Browse Boilerplates as how you want to get started with your app. Then, click the BROWSE BOILERPLATES button.
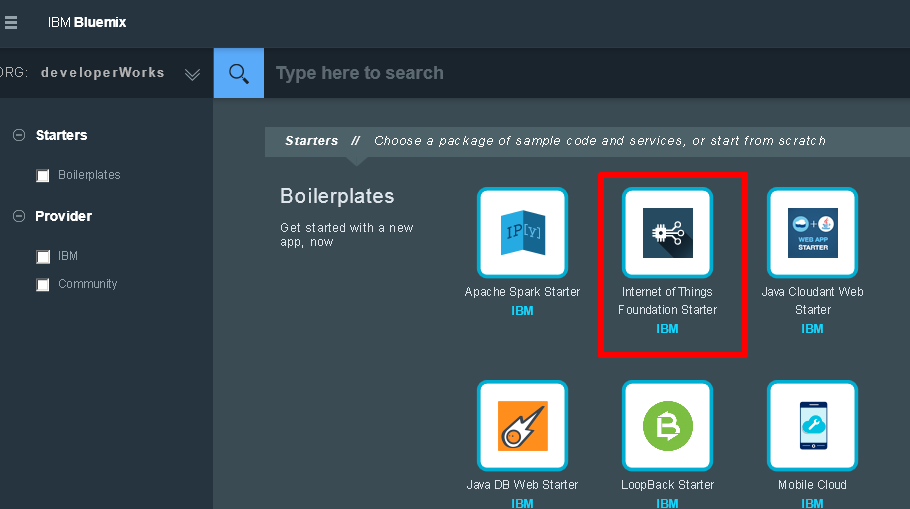
- Select the Internet of Things Foundation Starter boilerplate.
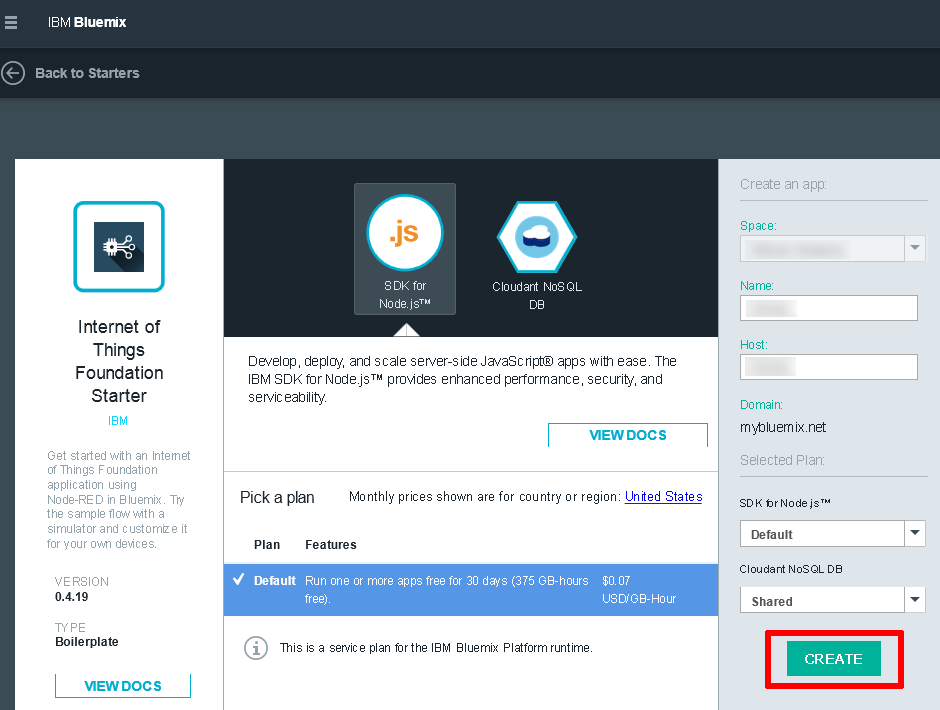
- In the Create an app area, specify a name for your Bluemix application, and click CREATE.
- After some time, your application is staged and launched. Click Overview to view the status of your app and see the bounded IoT Foundation service to your application in the list of available services.

Step 2: Register Devices with the Internet of Things Foundation Service
After you’ve successfully configured the service, the next step is to tell it about the devices that will be connecting to it.
For security, each instance of the IoT Foundation service isolates your devices and their data in a separate account, also called an organization. Each organization has a unique 6-character identifier that is automatically created with the IoT Foundation service. Devices and applications in one IoT Foundation organization are invisible to any other IoT Foundation organization.
- On your application detail page, select the Internet of Things Foundation service. The Internet of Things Foundation welcome page opens.
- Click the Launch dashboard button. The Internet of Things Foundation dashboard for your organization opens with the identifier at the top.
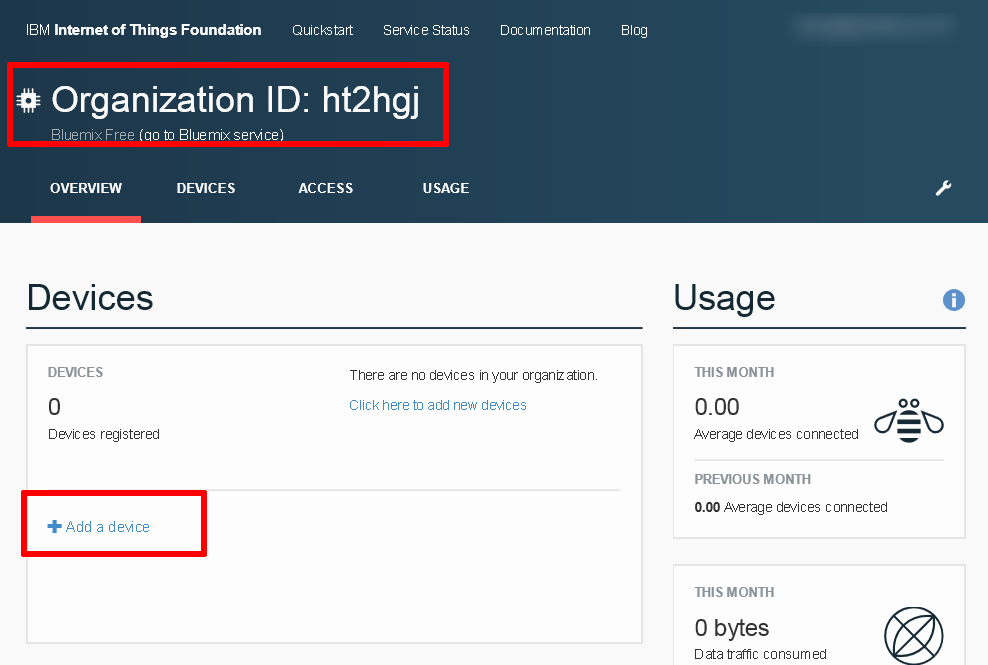
When you first start with an organization, no devices are registered. Your first step must be to create a device type, which serves as a template to register devices of a specific type. Then, your second step is to use that template to register devices with the IoT Foundation service.
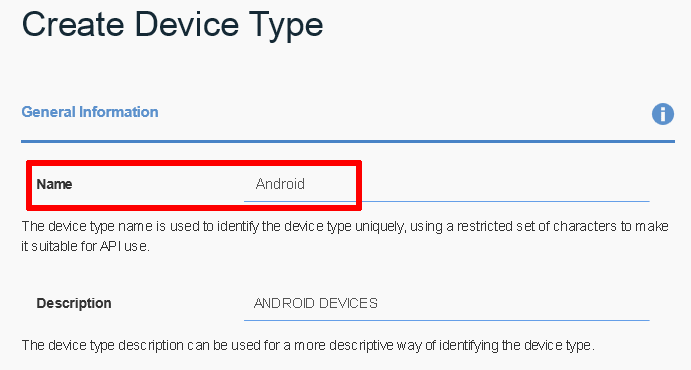
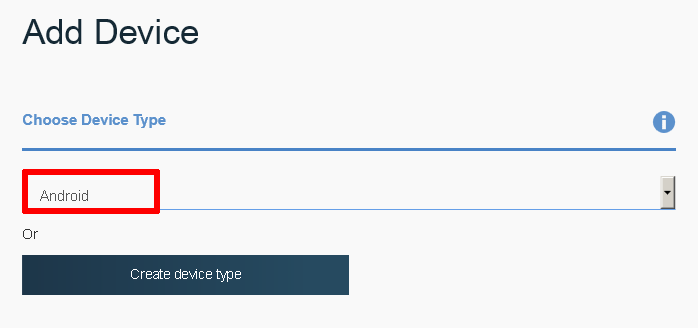
- Click Add a device. On the Create Device Type page, specify the device type and a brief description. You can choose any string for the device type, but your devices need to use the same string when they authenticate with the IoT Foundation service. For this tutorial, specify Android for the device type because the IoT Starter Application that you use in the next step is hard-wired to use this device type.
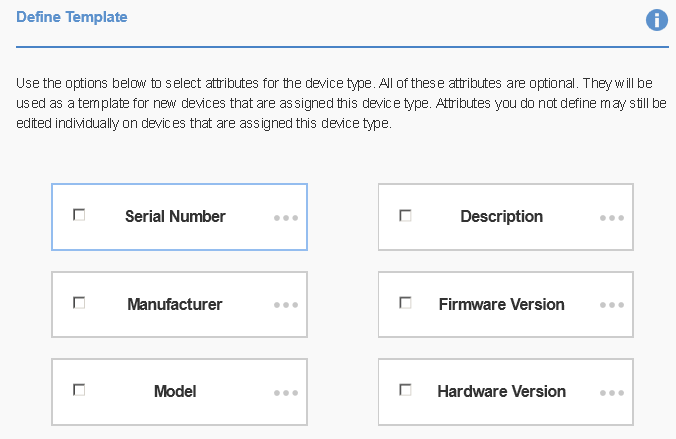
Although you can select additional attributes that your users must specify when they register a new device, such as its serial number or a hardware version, our simple application does not require any additional attributes. Save the device type.
-
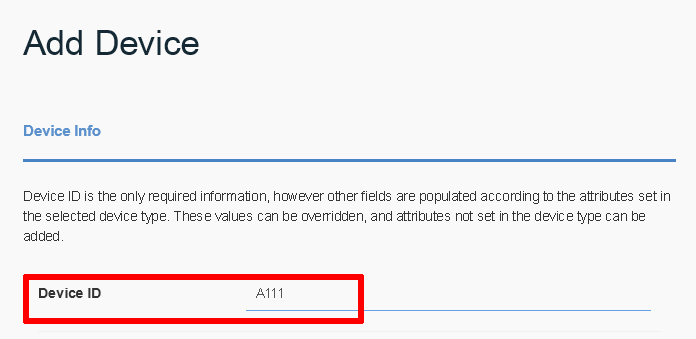
Click Add a new device, and select Android as the device type.
Enter a unique identifier for the device. It can be a random or descriptive string; for example, in this tutorial, use A111. Remember this device identifier because it will form part of the client identifier that your device will use when authenticating with the IoT Foundation service.
-
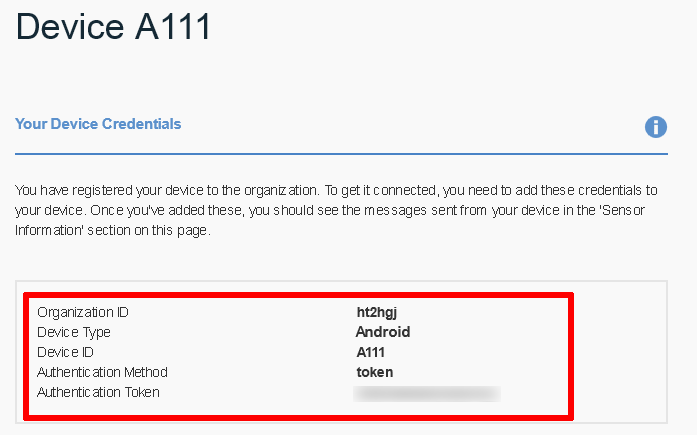
You will now be asked to provide or generate an authentication token for the device. Let the system generate it for you; the summary screen lists the details of your newly registered device, including the auto-generated token. Copy the token to your clipboard to use later in the tutorial, as it will not be displayed again.
Now, the device “A111” is registered with the IoT Foundation cloud and the IoT Foundation service can begin accepting data from it, subject to a valid authentication token.
Step 3: Compile and Install the IoT Starter for Android Application
The IoT Starter for Android is a sample Android application that lives on your Android smartphone or tablet and publishes a stream of data and events from the device accelerometer and other sensors to the IoT Foundation service. It can also receive commands from the IoT Foundation service. As such, it’s a great way to start experimenting with IoT Foundation and building applications to interact with real-time data streams.
If you are experienced in Android development, you can download the code from GitHub, import it into your Android development environment, and then build the apk file. Otherwise, to get the app installed and running quickly, follow these steps.
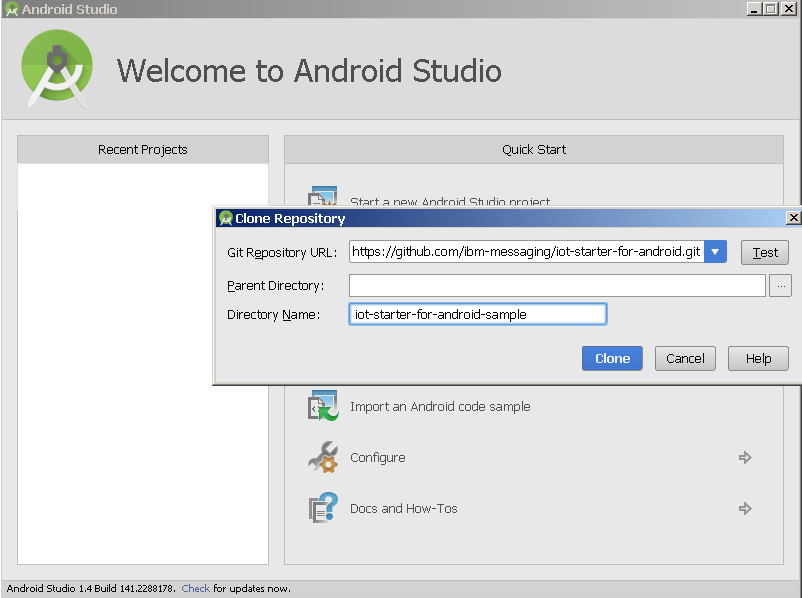
- Clone the project’s source code repository.
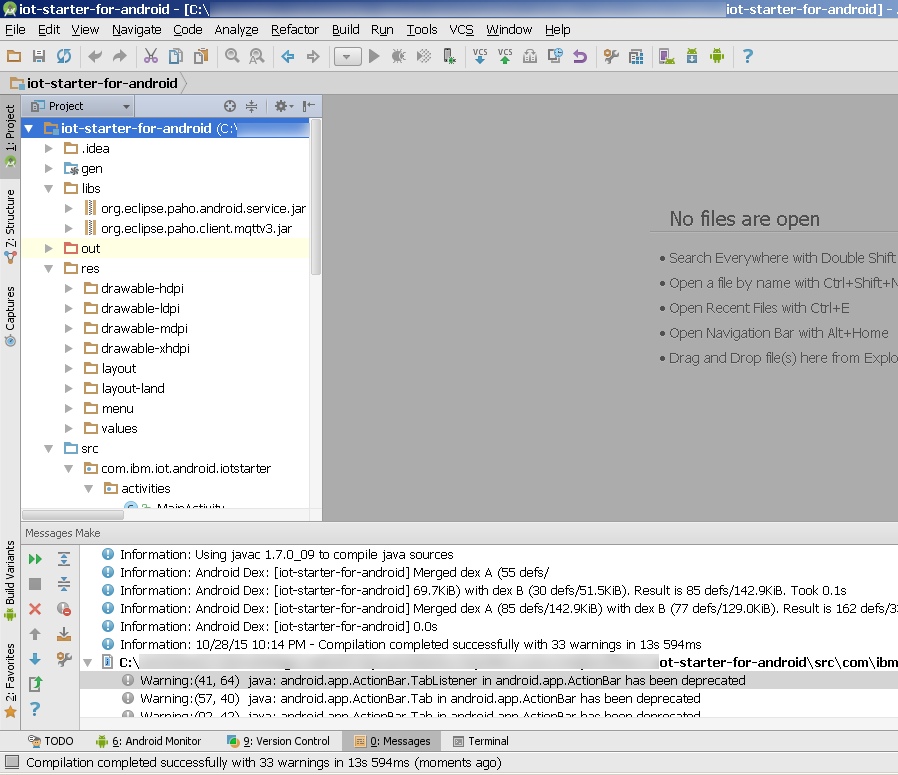
- Launch Android Studio.
- Click Quick Start > Check out project from Version Control > Git.
- In the Clone Repository dialog, specify the following GitHub repository: https://github.com/ibm-messaging/iot-starter-for-android
- Click Clone.
-
Compile the application by clicking the Build > Make menu. An Android application package (an .apk file) will be produced in the project’s out directory, for example:
out/production/iot-android-for-starter
-
Copy this .apk file to your Android device, and install it by using a file manager such as ES File Explorer.
Step 4: Publish Data from the Android Starter Application to the Internet of Things Foundation Service
- On your Android device, launch the app that you just installed.
- On the Welcome screen, enter the organization identifier, device identifier, and authentication token from Step 2.
- Click the Activate Sensor button.
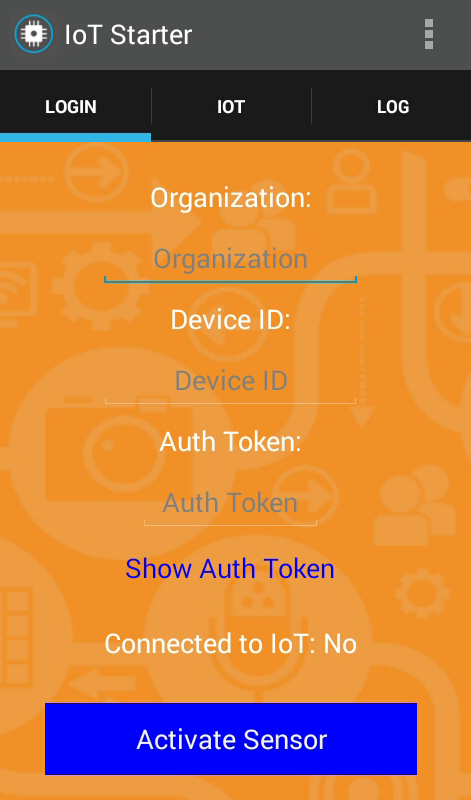
The application will attempt to connect to your organization and authenticate itself. If successful, you will see a notification like “Connected to IoT: Yes” on the application welcome screen, and your device will automatically begin sending data from its accelerometer to the IoT Foundation service.
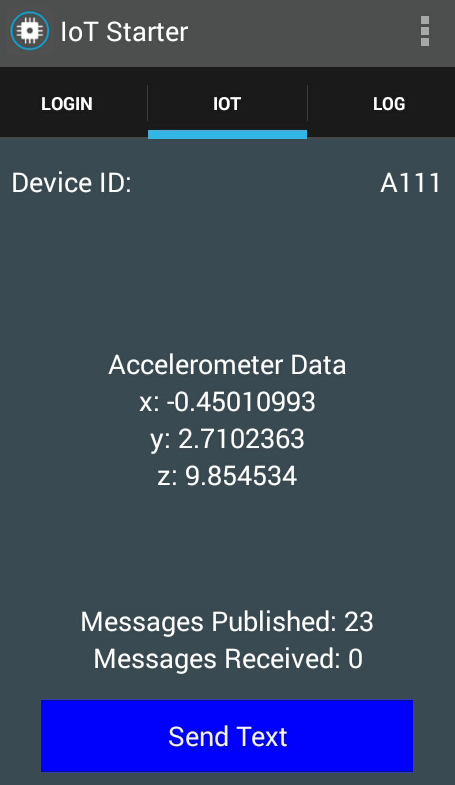
The data that is sent by an IoT device is published to topics, which are the rough equivalent of channels on the radio. Different types of events can be published to different topics. For example, for this device, accelerometer events are published to the topic iot-2/evt/accel/fmt/json, and touch events are published to the topic iot-2/evt/touchmove/fmt/json.
Return to the IoT Foundation service dashboard, and you should see the incoming data stream from the device as JSON documents. Here’s an example:
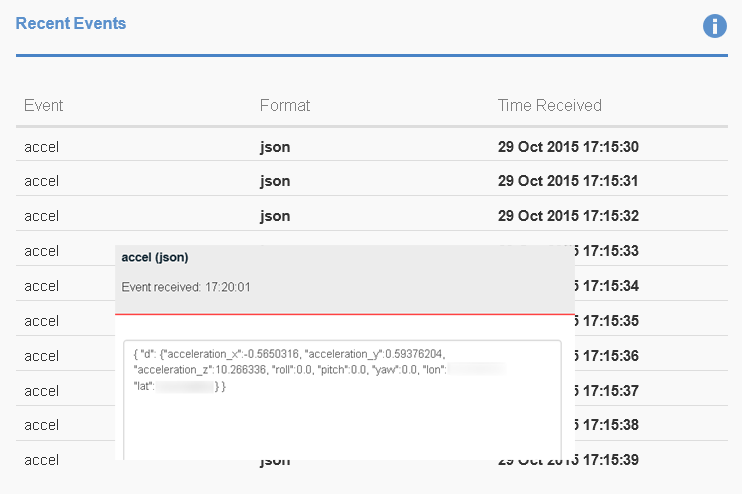
In particular, note the ‘lat’ and ‘lon’ keys in each JSON message, which contain the current GPS coordinates of the device. In case you don’t see these keys, ensure that your Android device is set to report its location and then relaunch the IOT Starter for Android application.
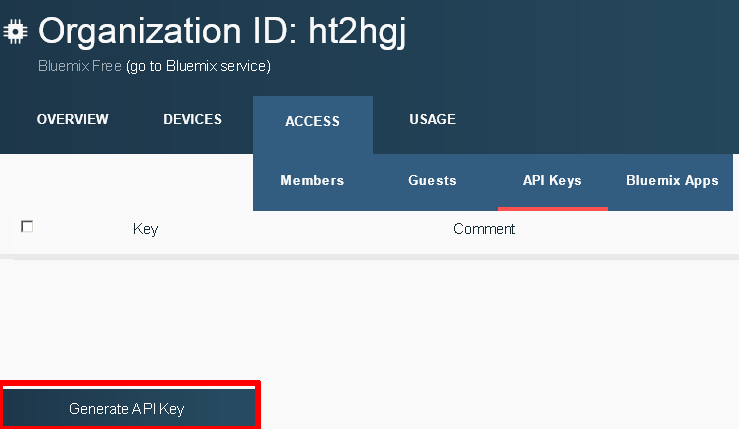
**Step 5: Generate an API Key for Application Access**
Now, you’ve got a stream of data that is arriving in your IoT Foundation organization from a registered device. To complete the picture, you need an application that can retrieve this data from the IoT Foundation organization and do something useful with it.
First, you must make sure that your application can access your IoT Foundation organization. Just as you generated an authentication token for your device in Step 2, you now need to generate an API key for your application.
-
Open the IoT Foundation dashboard for your organization.
-
Select Access > API Keys.
-
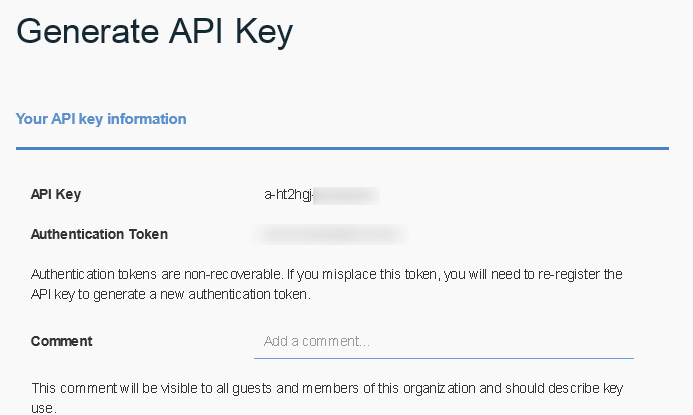
Click the Generate API Key button.
-
Make a note of the API key and authentication token that are generated for you. You’ll use both of these values in the next step.
-
Click Finish.
**Step 6: Consume Data from the Internet of Things Foundation Service in a PHP Application**
Now for the fun part. Devices and applications can send and receive data from the IoT Foundation service by using a lightweight messaging protocol called Message Queue Telemetry Transport or MQTT. The Android Starter Application publishes its accelerometer data to the IoT Foundation service by using MQTT, and any application that you build will usually need to “speak MQTT” so that it can receive data from the IoT Foundation service.
Just as a device publishes data to specific topics, an application can subscribe to and consume data in those topics. The device type and name should be specified as part of the topic name. For example, to subscribe to ‘accel’ events from device ‘A111’, the topic name is iot-2/type/Android/id/A111/evt/accel/fmt/json. The + symbol can be used as a wildcard character to refer to all device types or all devices.
If you’re using PHP for your application, one of the easiest ways to add MQTT support is with the phpMQTT library, a PHP class that lets you work with MQTT messages and brokers. To use it, clone or download it to your PHP development environment. The PHP scripts for this tutorial call the phpMQTT library.
Two PHP apps are created with two PHP scripts:
- cli-app.php - This script is run at the server console or at the command line.
- web-app.php - This script is accessed through a web browser.
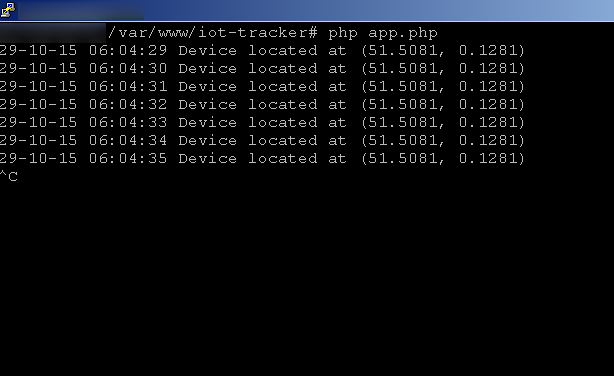
The script cli-app.php begins by initializing a new phpMQTT object, which will serve as the control point for all communication with the IoT Foundation service. This object needs several parameters, all of which are stored in the $config array at the top.
The parameters that phpMQTT needs are:
- The server name, which is usually named after your organization identifier under the ‘
messaging.internetofthings.ibmcloud.com’ domain. - The server port, which is 1883 for unencrypted connections and 8883 for encrypted connections.
- The client identifier. The application must authenticate itself by using a client identifier in the format a:
ORG_ID:APP_ID, where theAPP_IDis a user-supplied value. - The client API key and secret, which are needed to access the service.
After the object has been initialized, its connect() method can be used to connect to the IoT Foundation service by using the API key and authentication token from Step 5. The subscribe() method is used to subscribe to the accel topic; it also specifies a user-defined function to run for each incoming message.
In this script, the user-defined function is the getLocation() function, and its job is to use the PHP json_decode() function to extract the GPS data from each message and display it on the screen. The proc() method inspects and processes the stream of messages that arrive in that topic in a continuous loop.
Here’s an example of the output from the script:
Instead of displaying or reading the GPS data, you can create a PHP web app that can display the GPS data in a map.
Read more about Google Static Maps API on the Google Developers site in the Google Static Maps Developer Guide.
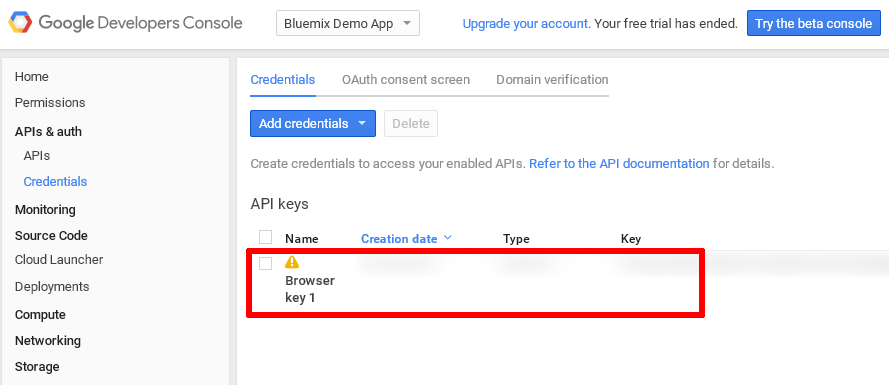
As you can imagine, it’s quite easy to use this GPS data stream to do something more useful, such as producing a map of the device’s location that is updated in real time. The Google Static Maps API has everything you need.
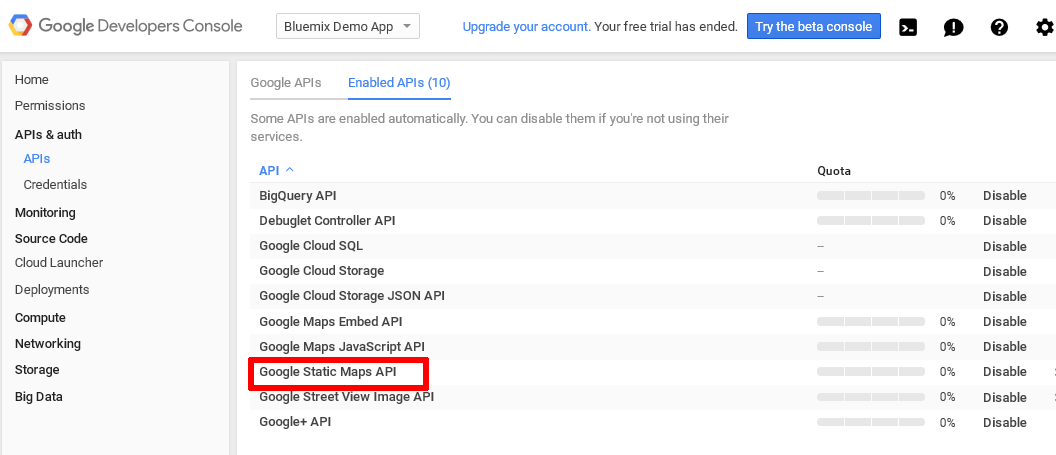
Familiarize yourself with the usage limits for this API.
Next, in the credentials screen, make a note of the API key for bro
After you’re done, you can create or update the web-app.php script, which displays the GPS data in a map.
Unlike the previous script, which was designed to process every message that was received in the topic and display it on the screen, the requirements for this script are slightly different and various workarounds are needed to use it in a web browser context:
-
First, you need to process the incoming data stream and extract the GPS coordinates from it to display the map in a browser, not merely output the values to the console. Thus, the values that are extracted during the execution of the getLocation() method need to be exposed to the rest of the script, which means you need to make it a global variable.
-
Second, to display the map, the app must interpolate the GPS coordinates into the Google Maps API endpoint and then request the map image by using the endpoint URL. However, it typically takes the client browser some time to perform this request and render the image. To avoid a situation where every new message results in a new request to the Google Maps API without the previous request completing, the proc() loop automatically terminates when the first message is received.
The problem with the previous implementation, of course, is that only the first message that is received from the device will be processed and all subsequent messages will be ignored. In this scenario, the map will reflect the first location of the device only. This is remedied by using a tag, which forces a page reload every 10 seconds. This effectively causes the script to reload and produce an updated map every 10 seconds.
- Third, should the device be turned off or disconnected from the IoT Foundation service, the proc() loop will wait endlessly (until the script times out) for a message, which leaves the user staring at an empty browser page followed by a timeout error message. This implementation is not particularly user-friendly, so to avoid this situation, the sleep() method is used to break out of the proc() processing loop after five seconds without it receiving a message in the subscribed topic, and the page displays an appropriate error message.
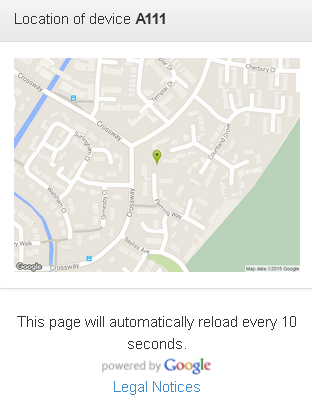
Here’s an example of what the script displays when you access it through your web browser:
Conclusion
For developers who are used to traditional web applications, the real-time data streams and publish/subscribe mechanisms of the IoT universe take some getting used to. IBM Bluemix and the IBM Internet of Things Foundation service help reduce the learning curve by providing all the necessary infrastructure to receive, manage, and transmit data to and from IoT sensors. If you add in some PHP glue, you’ll be on your way to building IoT applications with Bluemix in no time.
The concepts that were discussed in this article are only the tip of the iceberg. For example, this tutorial discussed only receiving and processing event data from IoT sensors – one-way communication, if you will. However, it’s just as easy (and even more interesting) to implement two-way communication loops to make IoT sensors react to requests and perform tasks or calculations.
Credits: IBM Developers